| Find in this manual | ||
| Replace with | ||
Once you are into an OOTP game in Play-by-Play mode, there are several different screens to look at, but only two pages on which the actual gameplay takes place: the BNN Broadcast screen and the BNN Webcast screen. We will get to those in a minute. Regardless of which screen you prefer, though, the basic Play-by-Play Controls remain the same, so before we describe those two separate screens, let's walk through the controls!
The Play-by-Play Controls live in the lower right corner of both the BNN Broadcast and BNN Webcast screens:

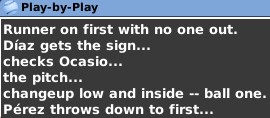
Options available in the Play-by-Play Control pane change depending on which team you are managing (the team on the field, or the team at bat), and even depending on the current game situation. For example, the Steal option isn't present if you have no one on base. The Play-by-Play Control mechanism is fairly simple. Click a button or press the corresponding number on your keyboard, and the game resolves the result of the pitch or play. As soon as you select a strategy, the Play-by-Play Control pane is replaced by a Play-by-Play window that "calls" the play:
After the current play is completed, click your mouse button or press any key to continue to the next play. Play-by-play continues in this fashion until the game is completed. While the Play-by-Play Control pane can only advance play one pitch or one play at a time, the Quick-Play Bar across the bottom of the BNN Broadcast and BNN Webcast pages allows you to advance the play of the game more quickly:

With the Quick-Play Bar, you can immediately jump to the end of the current at bat, the current half-inning, the current inning, or the entire game. You can also leap forward to the start of the inning of your choice. You can also save mid-game and return to the main game area. You can come back and continue the game at a later time.
Note: You can also use the Enter or Space keys on your keyboard to quick-play the current batter's plate appearance. When you quick-play a plate appearance, the play-by-play for the final pitch to the current batter is displayed.
Pitch Modes
In OOTP, you can choose to play out your games in two different modes: One-Pitch Mode or Pitch-by-Pitch Mode.
- One-Pitch Mode - In One Pitch Mode, the default, you select on strategic choice for this at-bat, and the computer will simulate all of the pitches in the at-bat, displaying only the final, decisive pitch in the at-bat. For example, you might choose "Swing Away," and the play-by-play call might immediately jump to "Here's the 3-2 pitch." The game simulated the first five pitches of the at-bat without showing them to you, and you only see the final pitch. In some cases, the game may show some non-final pitches in an at-bat, if they involve a result like a baserunner stealing.
- Pitch-by-Pitch Mode - In Pitch-by-Pitch Mode, you control each pitch in the game, one at a time.
Unsurprisingly, it takes significantly longer to play out a game in Pitch-by-Pitch Mode, but Pitch-by-Pitch Mode offers a greater degree of strategic control. The good news is, you can switch between these modes at any time, even halfway through an at-bat or an inning, by using the button in the lower right of the Play-by-Play Controls pane.
Offensive Play-by-Play Controls
The following options are available when you are controlling the team at bat:
| Offensive Option | Description |
| Swing Away | The batter will make a normal attempt to hit the ball. |
| Bunt for Hit | The batter will attempt to bunt to get on base. This option is usually used when the batter is both a good bunter and very fast. It is more often used with left-handed hitters. |
| Take Pitch | The batter will let the pitch go by, even if it is a good pitch. This option is often used when the pitcher is struggling with his control, or if the count is 3-0 or 3-1 and you hope to get a walk. |
| Steal (2nd, 3rd, Home) | The runner on the selected base will try to steal. He might not actually go if he cannot get a good jump, however. |
| Send Forced | The runners on base will go, no matter what happens at the plate. |
| Hit & Run | The runners will leave before the ball is hit, and the batter will try to make contact. This option is often used by teams who do not have a lot of power and need to 'manufacture' runs. |
| Run & Hit | The runners will leave before the ball is hit, and the batter has the option of trying to make contact or taking the pitch. This option is usually used only when the runner has a good chance of stealing a base. |
| Safety Squeeze | The batter will attempt to bunt, and the runner on third will try to score on the bunt. He will wait to see the ball hit the ground to prevent getting doubled up. (Available only when there is a runner on third.) |
| Suicide Squeeze | The batter will attempt to bunt, and the runner on third will try to score on the bunt as soon as the pitcher begins his forward motion toward the plate. (Available only when there is a runner on third.) |
Defensive Play-by-Play Controls
The following options are available when you are controlling the defensive team.
| Defensive Option | Description |
| Pitch | The pitcher delivers a pitch. |
| Pitch Around | The pitcher pitches to the batter, but is very careful, and thus likely to throw a ball. This option is often used when a dangerous hitter is up, and you're willing to walk him rather than give up a big hit. |
| Pitch Out | The pitcher 'pitches out' (throws a ball well wide of the hitter so that the catcher has a better chance to throw out a runner). This option is typically used when you expect a runner to try to steal. |
| Intentional Walk | The pitcher intentionally walks the hitter. This option is typically used when you don't want to risk pitching to a very dangerous hitter, especially if there is no runner on first base. |
| Hit Batter | The pitcher deliberately attempts to hit the batter with a pitch. |
| Visit Mound | The manager visits the pitcher on the mound. This option is usually used to try to calm down the pitcher if he has gotten in trouble. This option also helps use up some time if you are warming up a relief pitcher, and gives the manager a better idea of how tired his pitcher is. |
| Hold Runner(s) | The pitcher concentrates a bit more on the baserunner(s), speeding up his delivery of the next pitch. This option results in a slightly weaker pitching performance, but a slightly greater chance to pick off a runner. (Available only when one or more runners are on base.) |
| Throw to (1st, 2nd, 3rd) | The pitcher attempts to pick off the runner at the selected base. (Available only when a runner is on base.) |
Defensive Positioning
In addition to the defensive game controls, when you are managing the team in the field, you also get access to two special drop-downs that allow you to control the positioning of your defense.
| Infield Option | Description |
| Infield Normal | Standard positioning. |
| Infield In | The infielders play in (closer to home plate). This option is usually used in a close game, with a runner on third, when you want to prevent the runner from scoring at all costs. |
| Corners In | The first and third basemen play in. This option is frequently used when a bunt is expected. |
| Third Baseman In | Only the third baseman plays in. This option is frequently used when a bunt from a right-handed batter is expected. |
| First Baseman In | Only the first baseman plays in. This option is frequently used when a bunt from a left-handed batter is expected. |
| Guard Lines | The first and third basemen play closer to their respective bases than usual, preventing balls from going down the lines. This option is often used to prevent teams from getting extra-base hits, at the risk of a greater chance of allowing a single. |
| Shift Left | The second baseman, shortstop, and third basemen all play between second and third base. This option is often used when a very strong pull hitting right-handed hitter is at bat, to increase the chance of successfully fielding a ball that is pulled to the left side of the infield. |
| Shift Right | The second baseman, shortstop, and first basemen all play between second and first base. This option is often used when a very strong pull hitting left-handed hitter is at bat, to increase the chance of successfully fielding a ball that is pulled to the right side of the infield. |
You can select from the following options for positioning your outfield:
| Outfield Option | Description |
| Outfield Normal | Standard positioning. |
| Outfield In | Outfielders play in (closer to home plate). This option is typically used late in a game when a runner is on base who represents the tying or winning run, and you want to prevent the run from scoring-at the risk of having a ball hit over an outfielder's head that he would normally have been able to catch. |
| Outfield Deep | Outfielders play deep. This option is typically used when you want to protect a lead and don't want to let balls get behind your outfielders for extra-base hits. |