| Find in this manual | ||
| Replace with | ||
There are a number of different ways you can modify your FHM5 game, from adding customized graphics to editing game data to create new quickstart files.
Important! Customizing your game can often involve modifying the files that are installed with the game, so there is some degree of risk involved. The best protection against problems is to back up, back up, back up! If you're modifying something related to one specific game, you should back up that game using the in-game "save game as..." save option to create a new version of it for editing. If you're modifying the skin, graphics, or individual text files, you should back up those individual files or folders before modifying them. On top of that, customization often involves a decent amount of trial and error. It's much easier to restore a single backed up file than having to reinstall the game from scratch! There's no measuring the amount of frustration a good backup can save!
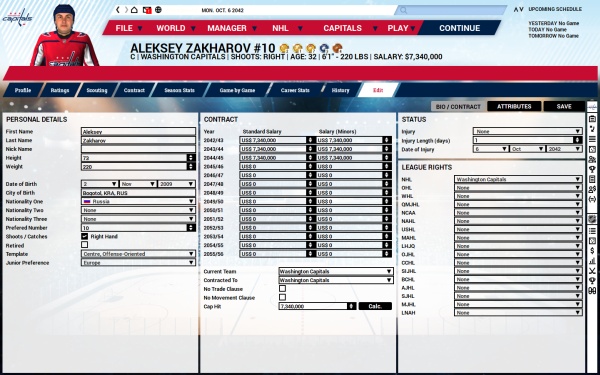
As for specific modifications, at the simplest level you can use Commissioner Mode and the edit buttons to modify data for leagues, players (see the Attributes and Templates sections for additional details), and teams. Much of the data can only be edited on July 1 or at the start of the game, and is inaccessible the rest of the time (changing league rules and settings in mid-season could seriously destabilize the game, leading to crashes.
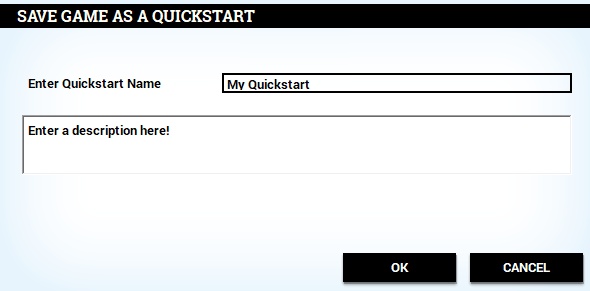
Changes you make in this manner can also be used to create a new Quickstart File - just use the "save as quickstart" option on the game menu to create a new start file with your changes. That way, if you have a particular set of edits you want to make to any game you play, you only have to enter them once.
Graphics Modification is another popular way of customizing your game. Among other things, the team and league logos and facegen uniforms and helmets can be changed:
(Note that all files must be in .png format, with that extension!)
- Team and league logos must be 150*150 pixels in size.
- In-game backgrounds are shown while watching games play live; the background displayed belongs to the home team. Three sizes are supported (just like the default background): 1024*768, 1280*800 and 1920*1200. The naming format is similar to team logos: teamname_size_year.png, where teamname is the exact team name (separate individual words with _), and the size is 1024, 1280 or 1920.
- Facegen jerseys and helmets can be completely customized. Creating these files can be somewhat complicated, so please check our modding forums for advice from users who are experienced working with them, as well as templates that will give you a big head start on producing your own.
In order to make finding the correct graphics folders easier, there's a shortcut in the troubleshooting menu in the preferences section of the start screen - just click on "Open customizable data folder" and the correct top-level folder will open, and from there you can go to the subfolder of your choice. To have your custom graphics appear in every game you start, you'll need to add them to the graphics subfolder within the appropriate quickstart directory, e.g. Historical.quick, Majors.quick, or OpeningDay.quick. Inside the graphics folder, you may need to create subfolders of your own if they don't already exist:
| Folder Name | Location For |
| arena_backgrounds | Arena background images to be displayed during games |
| helmet_pics | Cap, helmet, and goalie mask images for facegen |
| jersey_pics | Jersey and staff suit images for facegen |
| logo_leagues | League logos |
| logo_teams | Team logos |
Naming Coventions for Dynamic Updating
FHM5 will automatically update logo, jersey, and helmet files to a new version at the start of the season (July 1) if one is available. So, if the correct naming conventions are followed, there'll be no need to manually copy the files over every season to update a team or league's graphics. The naming system works as follows:
| File Type | Name Format |
| League Logos | national_hockey_league.png or national_hockey_league_2015.png or national_hockey_league_2010-2012.png |
| Team Logos | montreal_canadiens.png or montreal_canadiens_2015.png or montreal_canadiens_2010-2012.png |
| Jerseys | jersey_montreal_canadiens.png or jersey_montreal_canadiens_2015.png or jersey_montreal_canadiens_2010-2012.png |
| Helmets | helmet_montreal_canadiens.png or helmet_montreal_canadiens_2015.png or helmet_montreal_canadiens_2010-2012.png |
| Goalie Helmets | helmet_g_montreal_canadiens.png or helmet_g_montreal_canadiens_2015.png or helmet_g_montreal_canadiens_2010-2012.png |
Determining Player Names
To make it easier to determine the correct names to use for player/personnel picture files, there is an export names feature that can be activated via command line parameters. To use it, add these parameters: tracemode printplayers printpersonnel - e.g. on a Windows system, right-click the game shortcut, select properties, and chage the target field to "C:Program Files (x86)Out of the Park DevelopmentsFranchise Hockey Manager 5 hm5.exe tracemode printplayers printpersonnel". With those parameters active, open a saved game and FHM will add a line for each player and personnel to the debug trace file like this:
2016-11-03 13:38:38 PlayerID LastName FirstName FranchiseId TeamID TeamName PictureFileName DOBYear DOBMonth DOBDay

2016-11-03 13:38:38 1 Vinogradov Andrei 742 911 Bars Andrei_Vinogradov_5_7_1995.png 1995 7 5

2016-11-03 13:38:38 2 Afinogenov Maxim 736 736 Vityaz Maxim_Afinogenov_4_9_1979.png 1979 9 4
The colums are separated by a tab, so you can easily copy/paste the data to a spreadsheet. You could also use this data to create a DOS batch script to convert "old" picture files to the new naming convention by copying the old file to another folder using the new file name.
Steam Workshop
If you're playing the Steam version of the game, the The Steam workshop is now enabled in the game, which should simplify the distribution of your mods significantly. To upload them, please follow these instructions:
- Open the Steamworks tab in the start menu.
- Click on "Create Item".
- Enter a name and a description and click on OK.
- The new item will be created and published as a private item which is not visible to the public yet. You’ll see it the “your published itemsâ€.
- Open the Workshop in your Steam client with “Open workshop†or go directly to the published item with the “Show†link in the table.
- In this screen, you find options to delete the item, to edit it, to make it visible to the public, subscribe to it, and so on.
- To add a preview image, click on "Change" beside Preview Image and select the path to your preview picture.
- To add the data itself, you must navigate to the folder you're keeping it in. However, this folder must follow a specific format:
- For example, you want to make a modified staff picture. Create the folder C:FHM5projcustdataquickstart_gamesOpeningDay.quickgraphicspersonnel_pics (i.e., you need a top-level directory, then one named custdata, and below that the precise path that the file needs to go to within the Franchise Hockey Manager 5 folder - it needs to match exactly.)
- To upload the file(s), click on "Change" beside Source Folder and choose your top-level directory - in the above example, it's FHM5proj. Do not go further down than that, or your mod will not install correctly.
- Once that's done, you're finished. To test it, subscribe to the mod from the workshop screen of your Steam client, exit the game, then re-start it. You should see the message "This item is downloaded, click here to install it." Click that, and it'll install.